

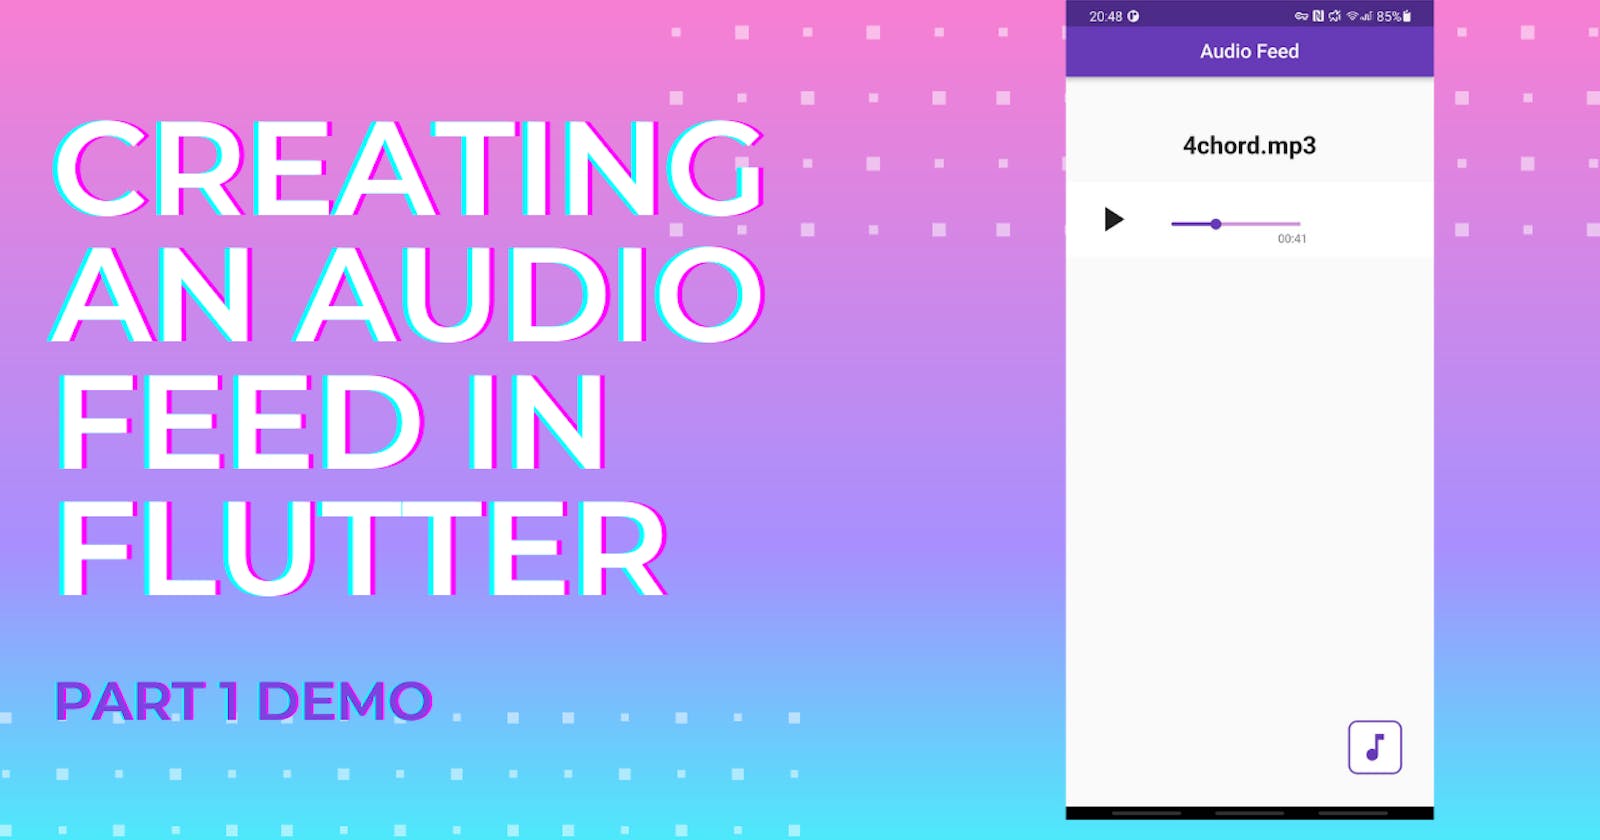
Creating an Audio Feed in Flutter (Part 1)
Create an Audio Controller in Flutter


Table of Contents
- Intro
- Project Setup
- Upload Audio Files from Local Storage
- Audio Player Component
- Conclusion
Intro
Flutter is an incredible tool for creating beautiful, natively compiled applications for mobile, web, desktop, and embedded devices from a single codebase. It is Google's (relatively) new UI toolkit for building everything Google nowadays from Google Home's to Fuchsia. A lot of big players in the tech world have adopted Flutter for their cross-platform needs and for good reason, along with simplifying cross-platform development, Flutter has an incredibly rich library ecosystem showcased on their package management site pub.dev.
At In The Loop, Flutter is a powerful tool to help us achieve our mission or creating a collaborative space for creators to showcase and store their music and short audio creations. We use Flutter, and its programming language of choice, Dart, as much as we can to simplify our development process, ship our app to users as soon as we can, and reach the largest possible audience.
Putting this to the test, in this tutorial, we're going to create an audio feed, similar to those featured in Spotify or Soundcloud, using Flutter. This is going to be a two part tutorial with part one being the creation of the audio player for a single audio file and part two being the process of pulling several audio files from Google Drive and displaying them in a list
The full project source code can be found at https://github.com/jonaylor89/AudioFeed
Project setup
First things first, to get started we need to create a new Flutter project. Flutter, like most modern compilers and application toolkits, has a clean cli which, importantly, allows you to create a new project. Below I've included the command to create a new Flutter project along with a screenshot of flutter --version run on my machine to show you the version of Flutter being used to create the project.
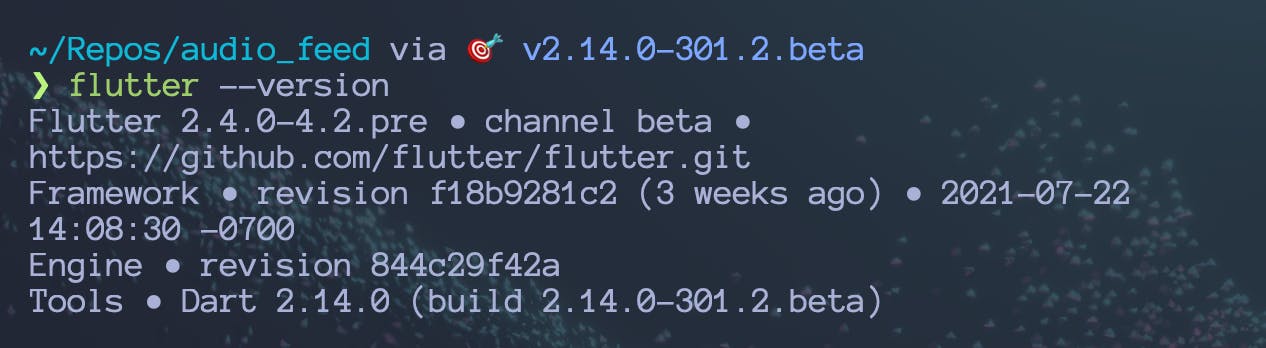
flutter create audio_feed
Once the Flutter boilerplate code is all created, the directory structure should look something like this:
.
├── README.md
├── analysis_options.yaml
├── android/
├── audio_feed.iml
├── build/
├── ios/
├── lib
│   ├── generated_plugin_registrant.dart
│   └── main.dart
├── macos/
├── pubspec.lock
├── pubspec.yaml
├── test/
└── web/
The only other thing to do for setting up this project is to get the home screen into its own file outside of main.dart which'll clean everything up. The template already has a HomeView Stateful widget so that just needs to be moved into its own file (which I optionally renamed audio_feed_view.dart):
.
├── audio_feed_view.dart
└── main.dart
This leaves main.dart looking like so:
import 'package:audio_feed/audio_feed_view.dart';
import 'package:flutter/material.dart';

void main() {
  runApp(const MyApp());
}

class MyApp extends StatelessWidget {
  const MyApp({Key? key}) : super(key: key);

  @override
  Widget build(BuildContext context) {
    return MaterialApp(
      debugShowCheckedModeBanner: false,
      title: 'Flutter Demo',
      theme: ThemeData(
        primarySwatch: Colors.deepPurple,
      ),
      home: const AudioFeedView(),
    );
  }
}
And the new AudioFeedView :
import 'package:flutter/material.dart';

class AudioFeedView extends StatefulWidget {
  const AudioFeedView({Key? key}) : super(key: key);

  @override
  _AudioFeedViewState createState() => _AudioFeedViewState();
}

class _AudioFeedViewState extends State<AudioFeedView> {

@override
  Widget build(BuildContext context) {
    return Scaffold(
      appBar: AppBar(
        title: const Center(
          child: Text('Audio Feed'),
        ),
      ),
      body: Container(),
    );
  }
}
Upload Audio Files from Local Storage
The next step to creating a simple audio controller is to get access to some audio files. For this task, we'll recruit the help of a library called file_picker by Miguel Ruivo. In short, this library will allow us to request access to a users files, filter files by file extension, and load the file into our Flutter project.
flutter pub add file_picker
To make things simple, we're just going to add a simple floating action button that'll use file_picker to load an audio file into our project that we can control later on. The first step in doing this is to create a new Flutter widget where we can put the code for our button. I've gone ahead and also created a components folder to put any other component widgets we create.
lib/
├── audio_feed_view.dart
├── components/
│   └── file_picker_button.dart
├── generated_plugin_registrant.dart
└── main.dart
import 'package:flutter/material.dart';

class FilePickerButton extends StatelessWidget {
  const FilePickerButton({Key? key}) : super(key: key);

  @override
  Widget build(BuildContext context) {
    return Container();
  }
}
You'll probably notice that I made this widget a Stateless widget and that's just because I want to avoid any fancy state management in this tutorial because there are other tutorials for that. For anything state related, AudioFeedView will pass in the necessary functions and variables (foreshadowing).
The code to create the button is fairly straightforward. The button is a Container with some decoration and an Icon in the middle. To give the button some action, the Container gets surrounded by a GestureDetector that'll listen to onTap events and call a function that passing in via parameters to the widget.
class FilePickerButton extends StatelessWidget {
  const FilePickerButton({Key? key, required this.onTap}) : super(key: key);

  final void Function()? onTap;

@override
  Widget build(BuildContext context) {
    return Padding(
      padding: const EdgeInsets.all(20.0),
      child: GestureDetector(
        onTap: _onTap,
        child: Container(
          height: 60,
          width: 60,
          decoration: BoxDecoration(
            borderRadius: BorderRadius.circular(10),
            color: Colors.white,
            border: Border.all(
              color: Colors.deepPurple,
              width: 2,
            ),
          ),
          child: const Icon(
            Icons.music_note,
            size: 40,
            color: Colors.deepPurple,
          ),
        ),
      ),
    );
  }
}
To make the button a floating action button, it needs to be imported to the AudioFeedView and passed in to the Scaffold as a floatingActionButton .
@override
Widget build(BuildContext context) {
  return Scaffold(
    appBar: AppBar(
      title: const Center(
        child: Text('Audio Feed'),
      ),
    ),
    floatingActionButton: FilePickerButton(
      onTap: handleAudioFromFiles, //handleAudioFromFiles() defined next
    ),
    body: Container(),
  );
}
Finally, using the file_picker library, the handleAudioFromFiles() function is defined along with a variable, _pickedAudio which will store the audio file that's loaded from our files.
import 'package:audio_feed/components/file_picker_button.dart';
import 'package:file_picker/file_picker.dart';

class AudioFeedView extends StatefulWidget { ... }

class _AudioFeedViewState extends State<AudioFeedView> {

File? _pickedAudio;

void handleAudioFromFiles() async {
    try {
            // Choose files from storage
      FilePickerResult? audioFileResult = await FilePicker.platform.pickFiles(
        type: FileType.custom,
        allowedExtensions: ['mp3'],  // Only show mp3 files
      );

      if (audioFileResult != null) {
        final String path = audioFileResult.files.single.path!;

        File pickedAudio = File(path);

                // rebuild the widget with the new pickedAudio defined and initialized
        setState(() {
          _pickedAudio = pickedAudio;
        });
      }
    } catch (error) {
      print(error);
    }
  }

@override
  Widget build(BuildContext context) { ... }
}
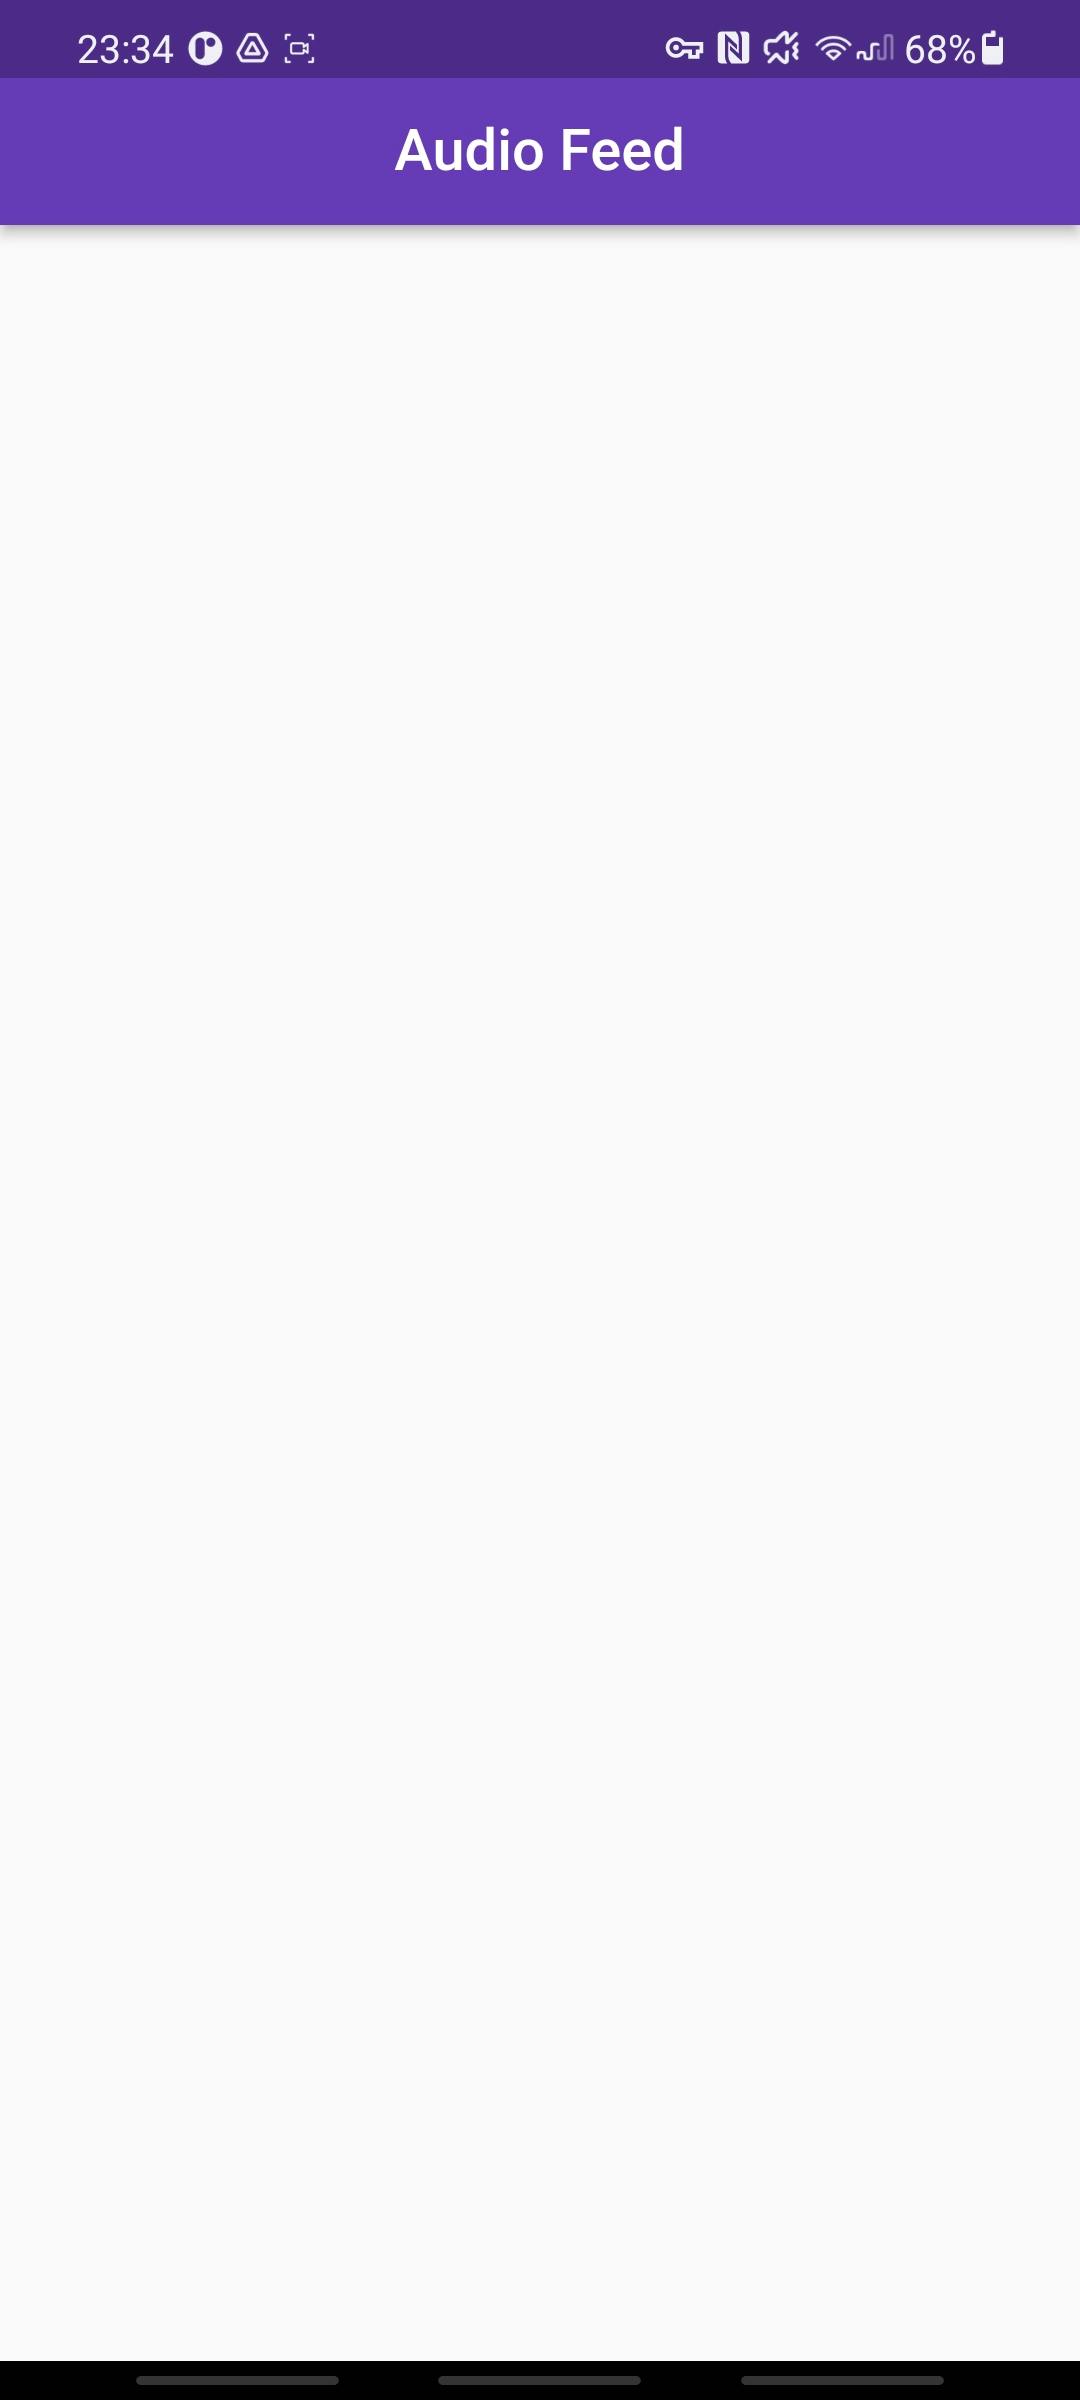
Just to make sure everything works so far, let's display the filename on the AudioFeedView Widget.
@override
  Widget build(BuildContext context) {
    return Scaffold(
      appBar: AppBar(
        title: const Center(
          child: Text('Audio Feed'),
        ),
      ),
      floatingActionButton: FilePickerButton(
        onTap: handleAudioFromFiles,
      ),
      body: Center(
        child: Column(
          children: [
            _pickedAudio == null
                ? const SizedBox.shrink()
                : Text(
                        _audioFile.path.split('/').last,
                        style: const TextStyle(
                              fontSize: 25,
                              fontWeight: FontWeight.bold,
                        )
          ],
        ),
      ),
    );
  }
Audio Player Component
Moving on to building the audio player, for this example, I chose to use the excellent library just_audio by Ryan Heise. Not only does the library do everything needed to get a functional audio player working, it also has a great example project and intuitive interface.
flutter pub add just_audio
After installing the library, the next step is to create the widget to store all the UI and logic for controlling the audio. This widget will need to get the selected audio file as an input.
import 'dart:io';

import 'package:audio_feed/components/seek_bar.dart';
import 'package:flutter/cupertino.dart';
import 'package:flutter/material.dart';
import 'package:just_audio/just_audio.dart';
import 'package:rxdart/rxdart.dart';

class AudioContainer extends StatefulWidget {
  const AudioContainer({Key? key, required this.audioFile}) : super(key: key);

  final File audioFile;

  @override
  _AudioContainerState createState() => _AudioContainerState();
}

class _AudioContainerState extends State<AudioContainer> {
  File get _audioFile => widget.audioFile;
  final AudioPlayer _player = AudioPlayer();

    @override
    Widget build(BuildContext context) {
        _player.setFilePath(_audioFile.path);
      return Column(
      children: [
        const SizedBox(height: 50.0),
        Padding(
          padding: const EdgeInsets.symmetric(horizontal: 20, vertical: 10),
          child: Text(
            _audioFile.path.split('/').last,
            style: const TextStyle(
              fontSize: 25,
              fontWeight: FontWeight.bold,
            ),
          ),
        ),
            ],
        );
    }
}
And remember to add the AudioContainer to the AudioFeedView for it to be displayed.
@override
  Widget build(BuildContext context) {
    return Scaffold(
      appBar: AppBar(
        title: const Center(
          child: Text('Audio Feed'),
        ),
      ),
      floatingActionButton: FilePickerButton(
        onTap: handleAudioFromFiles,
      ),
      body: Center(
        child: Column(
          children: [
            _pickedAudio == null
                ? const SizedBox.shrink()
                : AudioContainer(
                    audioFile: _pickedAudio!,
                  ),
          ],
        ),
      ),
    );
  }
Before getting into the nitty-gritty, let's quickly add some extra Columns, Rows, and Padding to elements to format everything a little better.
@override
  Widget build(BuildContext context) {
    _player.setFilePath(_audioFile.path);
    return Column(
      children: [
        const SizedBox(height: 50.0),
        Padding(
          padding: const EdgeInsets.symmetric(horizontal: 20, vertical: 10),
          child: Text(
            _audioFile.path.split('/').last,
            style: const TextStyle(
              fontSize: 25,
              fontWeight: FontWeight.bold,
            ),
          ),
        ),
        const SizedBox(height: 15.0),
        Container(
          padding: const EdgeInsets.symmetric(horizontal: 20, vertical: 10),
          decoration: const BoxDecoration(
            color: Colors.white, //background color of box
          ),
          child: Column(
            children: [
              Row(
                children: [
                    // Play/Pause Button Widget
                    const SizedBox(width: 10),
                    // SeekBar Widget
                ],
              ),
            ],
          ),
        ),
        const SizedBox(height: 20),
      ],
    );
  }
The play/pause button in this application has a few jobs. First, it needs to listen to changes in the _player state. Second, it needs to change the UI (specifically the icon) depending on the state of the _player . Lastly, it needs to change the _player state when tapped.
Beginning with the job of listening to changes in state, any Flutter developer should immediately thing of Flutter's amazing widget StreamBuilder . This useful widget makes is incredibly easy to consume a Stream and react to change by modifying the UI with a builder . In this case, the Stream we need to listen to, is of the type PlayerState which, thankfully, just_audio already provides for us. Reading the state of the Stream at any given moment, we can figure out whether the _player is currently playing or not and use the builder to display a play icon, a pause icon, a loading indicator, or even a replay icon if the audio file completes. Check the just_audio documentation for all the possible states. For each icon, we'll also attach a function to them to change the _player state when the icon is tapped.
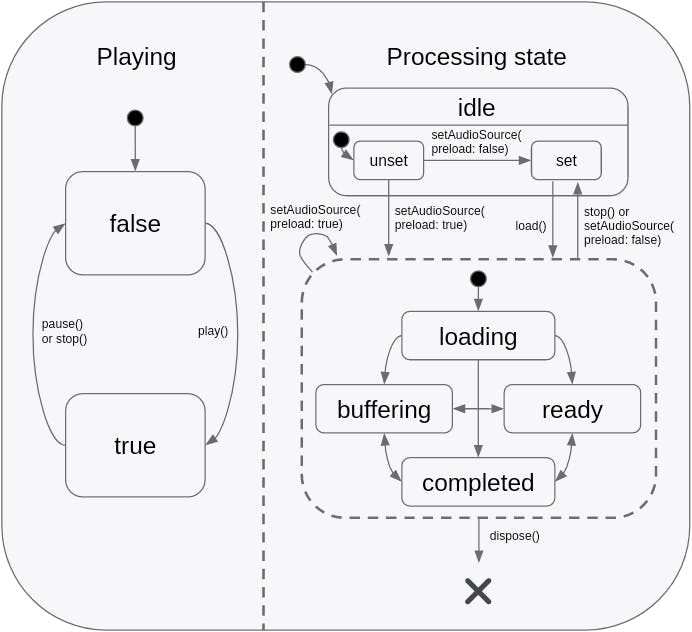
AudioPlayer State Machine
Play/Pause Button
...

StreamBuilder<PlayerState>(
  stream: _player.playerStateStream,
  builder: (context, snapshot) {
    final playerState = snapshot.data;

    if (playerState == null) {
      return const SizedBox.shrink();
    }

    final processingState = playerState.processingState;

    final playing = playerState.playing;
    if (processingState == ProcessingState.loading ||
        processingState == ProcessingState.buffering) {
            // Loading
      return Container(
        margin: const EdgeInsets.all(8.0),
        width: 48.0,
        height: 48.0,
        child: const CircularProgressIndicator(),
      );
    } else if (playing != true) {
            // Paused
      return IconButton(
        icon: const Icon(Icons.play_arrow),
        iconSize: 48.0,
        onPressed: () {
          _player.play();
        },
      );
    } else if (processingState != ProcessingState.completed) {
            // Playing
      return IconButton(
        icon: const Icon(Icons.pause),
        iconSize: 48.0,
        onPressed: () {
          _player.pause();
        },
      );
    } else {
            // Completed
      return IconButton(
        icon: const Icon(Icons.replay),
        iconSize: 48.0,
        onPressed: () => _player.seek(
          Duration.zero,
          index: _player.effectiveIndices!.first,
        ),
      );
    }
  },
),

...
The process for creating the seek bar is very similar to creating the play/pause button in the sense that it also uses a Stream to dynamically build the widget except it's a little more complicated and requires some extra finesse. In this case, we're listening to three different Stream. The first Stream we're listening to is a stream of the current audio's duration (in case it changes for some reason), the second Stream is the current position in the audio, and the final Stream is the buffered position to which buffered audio is available. To streamline things, I've gone ahead and combined the position stream and buffered position stream into one stream of type PositionData (defined later). The rest of the logic up to drawing the seek bar is just bounds checking to make the buffered position isn't greater than the duration and the normal position isn't greater than the duration. These streams get funneled into the seek bar which we're define in a moment.
...

Column(
  crossAxisAlignment: CrossAxisAlignment.start,
  children: [
    const SizedBox(height: 10),
    StreamBuilder<Duration?>(
      stream: _player.durationStream,
      builder: (context, snapshot) {
        final duration = snapshot.data ?? Duration.zero;

                /* PositionData is a class we'll define in a sec */
        return StreamBuilder<PositionData>(
          stream: Rx.combineLatest2<Duration, Duration, PositionData>(
              _player.positionStream,
              _player.bufferedPositionStream,
              (position, bufferedPosition) => PositionData(position, bufferedPosition),
                    ),
          builder: (context, snapshot) {
            final positionData = snapshot.data ??
                PositionData(Duration.zero, Duration.zero);
            var position = positionData.position;
            if (position > duration) {
              position = duration;
            }
            var bufferedPosition =
                positionData.bufferedPosition;
            if (bufferedPosition > duration) {
              bufferedPosition = duration;
            }

                        /* SEEKBAR IS A WIDGET WE'LL DEFINE IN A SEC */
            return SeekBar(
              duration: duration,
              position: position,
              bufferedPosition: bufferedPosition,
              onChangeEnd: (newPosition) {
                _player.seek(newPosition ?? const Duration());
              },
            );
          },
        );
      },
    ),
  ],
),

...
Before moving to the SeekBar, it's important to give create to where most of the code for the SeekBar comes from and that's amazing examples and tutorials others have made for just_audio . With that being said, since most of the code for the SeekBar, outside of superficial adjustments, has been gone over by others, I'll only be briefly mentioning how everything is working.
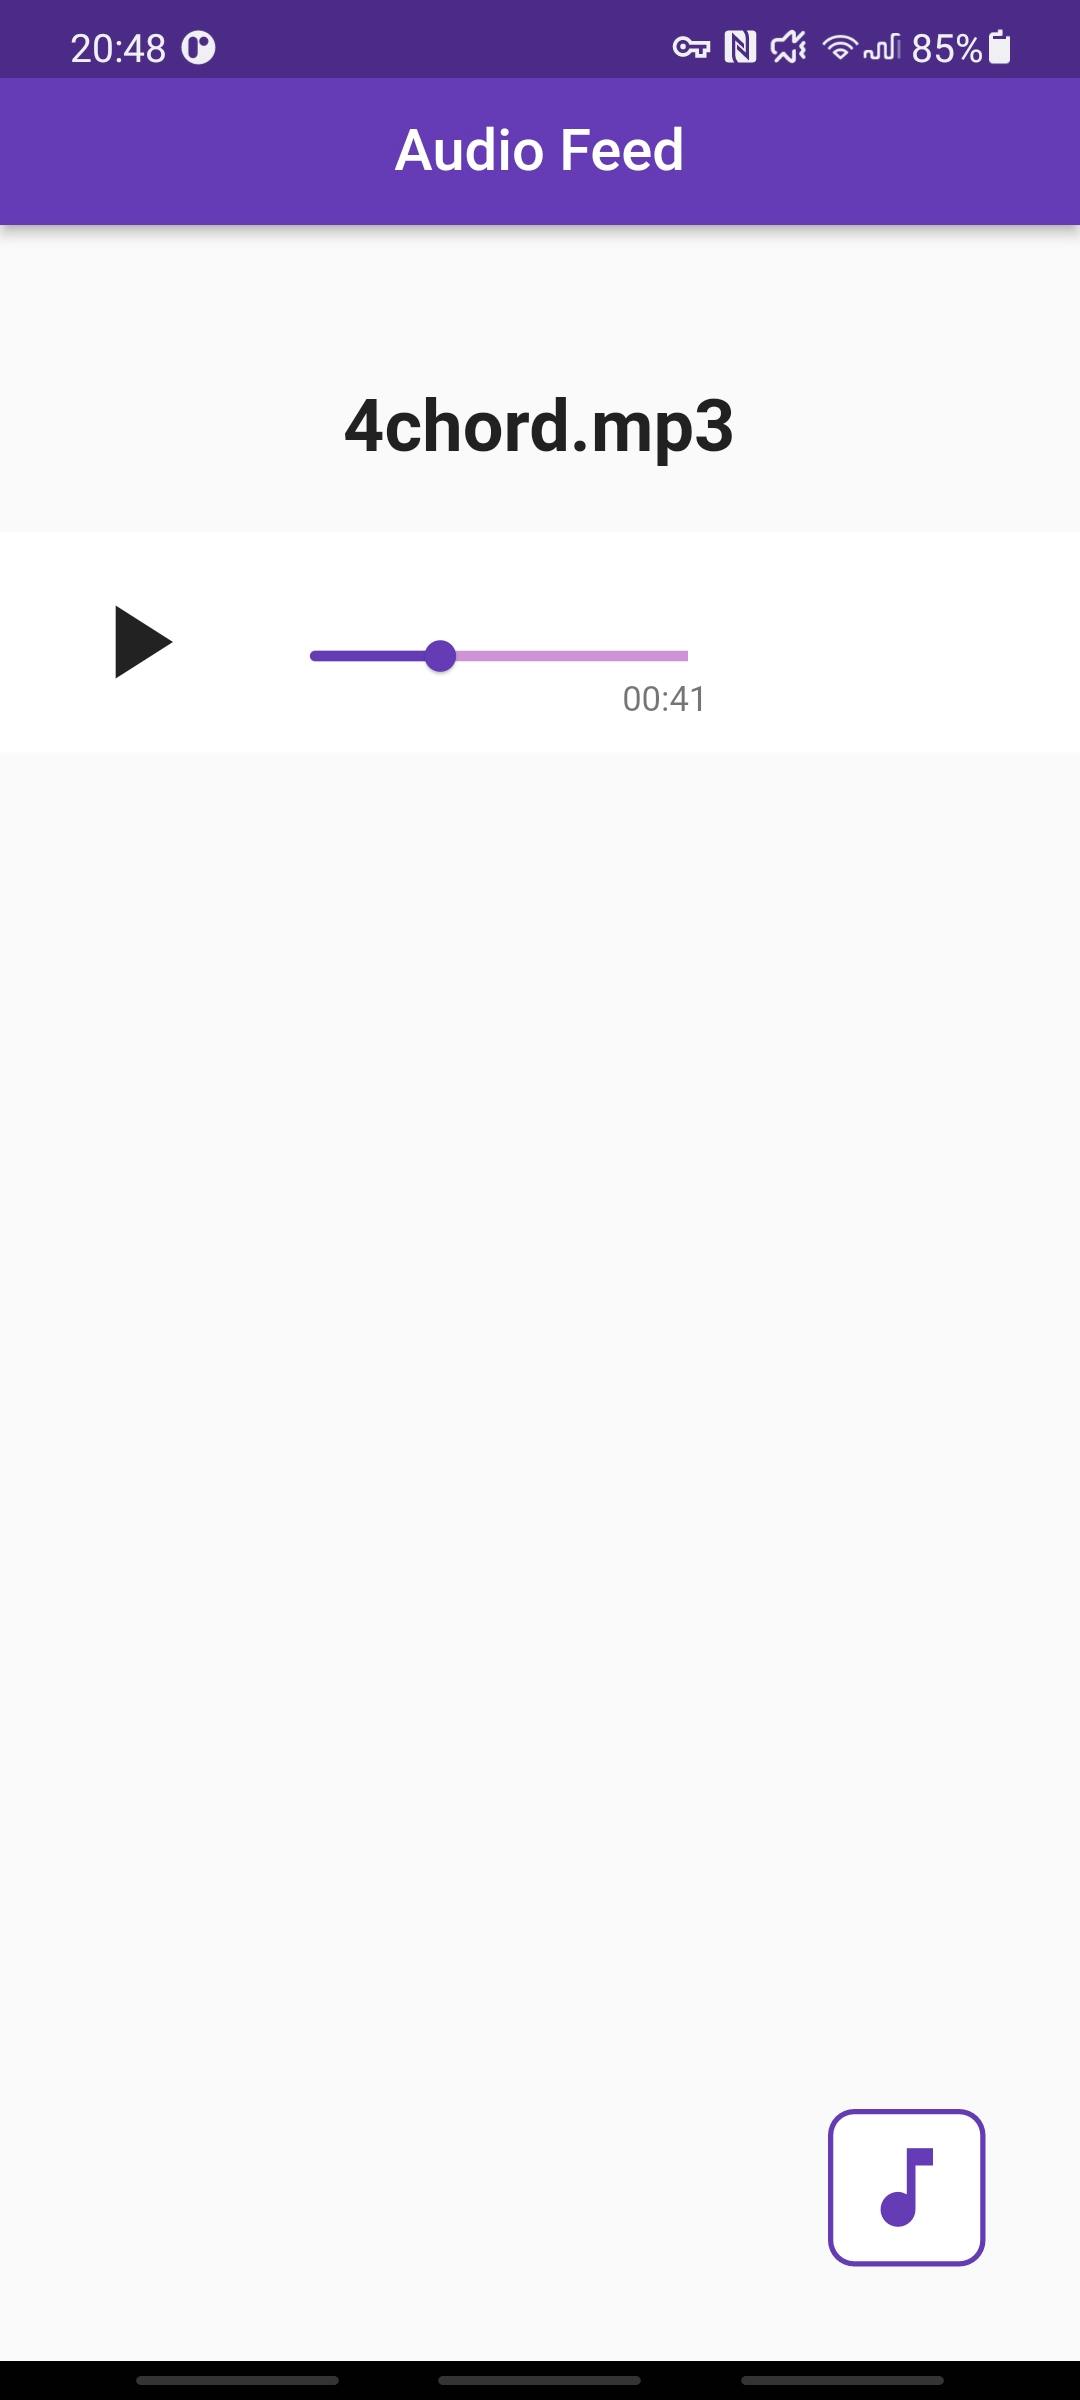
The SeekBar at its code is just two Sliders. One Slider is used to show the status of buffered position and the other Slider is used to show the status of the normal position. By moving the position Slider with our finger (or mouse if doing this in a simulator) the new position is recorded and seeked to by the AudioPlayer . There is also some text in the bottom right hand corner of the SeekBar to display the number of seconds left.
Seek Bar
class SeekBar extends StatefulWidget {
  final Duration duration;
  final Duration position;
  final Duration? bufferedPosition;
  final ValueChanged<Duration?>? onChanged;
  final ValueChanged<Duration?>? onChangeEnd;

  const SeekBar({
    Key? key,
    required this.duration,
    required this.position,
    this.bufferedPosition,
    this.onChanged,
    this.onChangeEnd,
  }) : super(key: key);

  @override
  _SeekBarState createState() => _SeekBarState();
}

class _SeekBarState extends State<SeekBar> {
  double? _dragValue;
  SliderThemeData? _sliderThemeData;

  @override
  void didChangeDependencies() {
    super.didChangeDependencies();

        // A little bit of theming
    _sliderThemeData = SliderTheme.of(context).copyWith(
      activeTrackColor: Colors.deepPurple,
      inactiveTrackColor: Colors.deepPurple,
      thumbColor: Colors.deepPurple,
      thumbShape: const RoundSliderThumbShape(enabledThumbRadius: 6.0),
      trackHeight: 2.0,
    );
  }

  @override
  Widget build(BuildContext context) {
    return Stack(
      children: [
        SliderTheme(
          data: _sliderThemeData!.copyWith(
            activeTrackColor: Colors.purple.shade200,
            inactiveTrackColor: Colors.grey.shade300,
            thumbShape: const RoundSliderThumbShape(enabledThumbRadius: 0.0),
          ),
          child: ExcludeSemantics(
            child: Slider(
              min: 0.0,
              max: widget.duration.inMilliseconds.toDouble(),
              value: widget.bufferedPosition!.inMilliseconds.toDouble(),
              onChanged: (value) {
                setState(() {
                  _dragValue = value;
                });
                if (widget.onChanged != null) {
                  widget.onChanged!(Duration(milliseconds: value.round()));
                }
              },
              onChangeEnd: (value) {
                if (widget.onChangeEnd != null) {
                  widget.onChangeEnd!(Duration(milliseconds: value.round()));
                }
                _dragValue = null;
              },
            ),
          ),
        ),
        SliderTheme(
          data: _sliderThemeData!.copyWith(
            inactiveTrackColor: Colors.transparent,
            valueIndicatorTextStyle: const TextStyle(
              color: Colors.white,
            ),
          ),
          child: Slider(
            min: 0.0,
            max: widget.duration.inMilliseconds.toDouble(),
            value: min(_dragValue ?? widget.position.inMilliseconds.toDouble(),
                widget.duration.inMilliseconds.toDouble()),
            onChanged: (value) {
              setState(() {
                _dragValue = value;
              });
              if (widget.onChanged != null) {
                widget.onChanged!(Duration(milliseconds: value.round()));
              }
            },
            onChangeEnd: (value) {
              if (widget.onChangeEnd != null) {
                widget.onChangeEnd!(Duration(milliseconds: value.round()));
              }
              _dragValue = null;
            },
          ),
        ),
        Positioned(
          right: 16.0,
          bottom: 0.0,
          child: Text(
              RegExp(r'((^0*[1-9]\d*:)?\d{2}:\d{2})\.\d+$')
                      .firstMatch("$_remaining")
                      ?.group(1) ??
                  '$_remaining',
              style: Theme.of(context).textTheme.caption),
        ),
      ],
    );
  }

  Duration get _remaining => widget.duration - widget.position;
}

class PositionData {
  final Duration position;
  final Duration bufferedPosition;

  PositionData(this.position, this.bufferedPosition);
}
Conclusion
And we're done! With the help of incredible libraries like just_audio it's insanely easy to create functional, cross-platform Flutter apps. For this app specifically, there are several improvements that could be made to make it better including, better state management, cleaner UI, and taking advantage of just_audio's powerful features to manipulate the audio (speed up, slow down, control volume, clip, etc). In the next part of this series, we're going to extend this app to pull audio from Google Drive and display it in a feed similar to twitter or instagram.
The full project source code can be found at https://github.com/jonaylor89/AudioFeed
In The Loop Community
We hope you've learned a bit more about the lifecycle of a song. The entire purpose of In The Loop is to connect growing artists and producers and allow them to showcase their work in a space for constructive feedback while also participating in competitions tailored to the community. Currently, we are creating our community on Discord as we finalize our application, In The Loop. We are always looking for new beta testers to help improve the application so that we can be sure to match our app to user wants and needs. If you would be interested in being a beta tester, we have an Instagram page @itl_studios and we can give more information there if you shoot us a direct message!
Discord: Stay In The Loop
Also, if you enjoyed this blog post or any of our previous posts, be sure to join our Discord server which can be found at discord.gg/c7Hf3HX6Hh
Further Reading & Links
- Audio library (https://pub.dev/packages/just_audio)
- More about the StreamBuilder component (https://api.flutter.dev/flutter/widgets/StreamBuilder-class.html)
- More advanced state management (https://bloclibrary.dev/#/)